Written by Chad Wesley Smith
The Jerk is the most missed lift in Weightlifting, fix yours with these 5 important technical aspects.
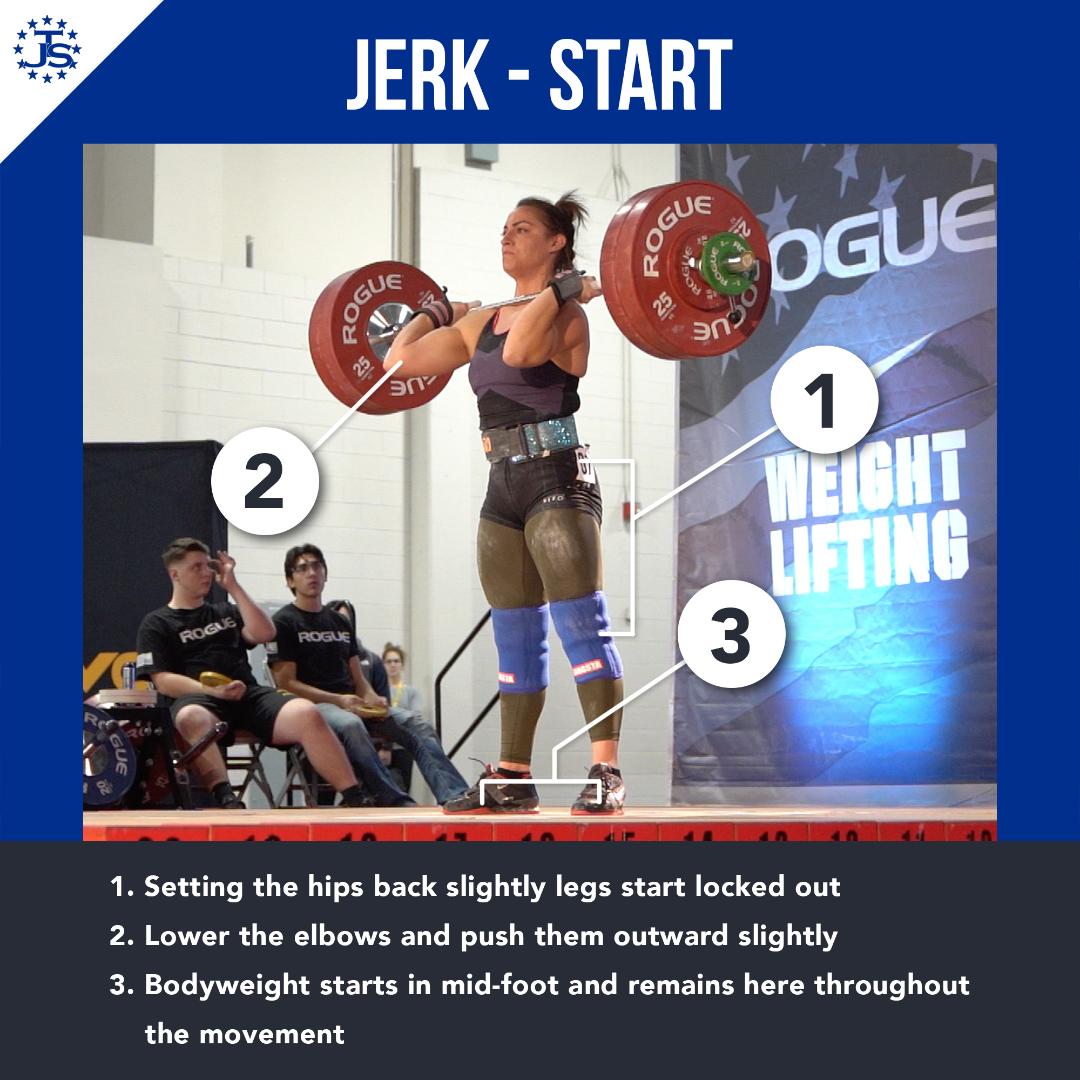
The start position of the Jerk is critical to get the most vertical and powerful bar path you can
#1-Set the Hips
Set the hips back slightly to allow for a straight and balanced dip. Positioning the hips directly under the torso can cause the lifter to drift forward at the bottom of the dip and drive the bar out front.
#2-Lower the Elbows
Drop the elbows down and out slightly. This position allows you to maximize the involvement of the arms in drive and catch phase. If the elbows are too high at the start of the dip you may end up feeling disconnected from the bar once it is driven from your shoulders.
#3-Bodyweight Midfoot
Keep your bodyweight in the middle of your foot as you start the dip. If your weight is too far forward or too far back you will lose balance during the dip and end up driving the bar forward too much.
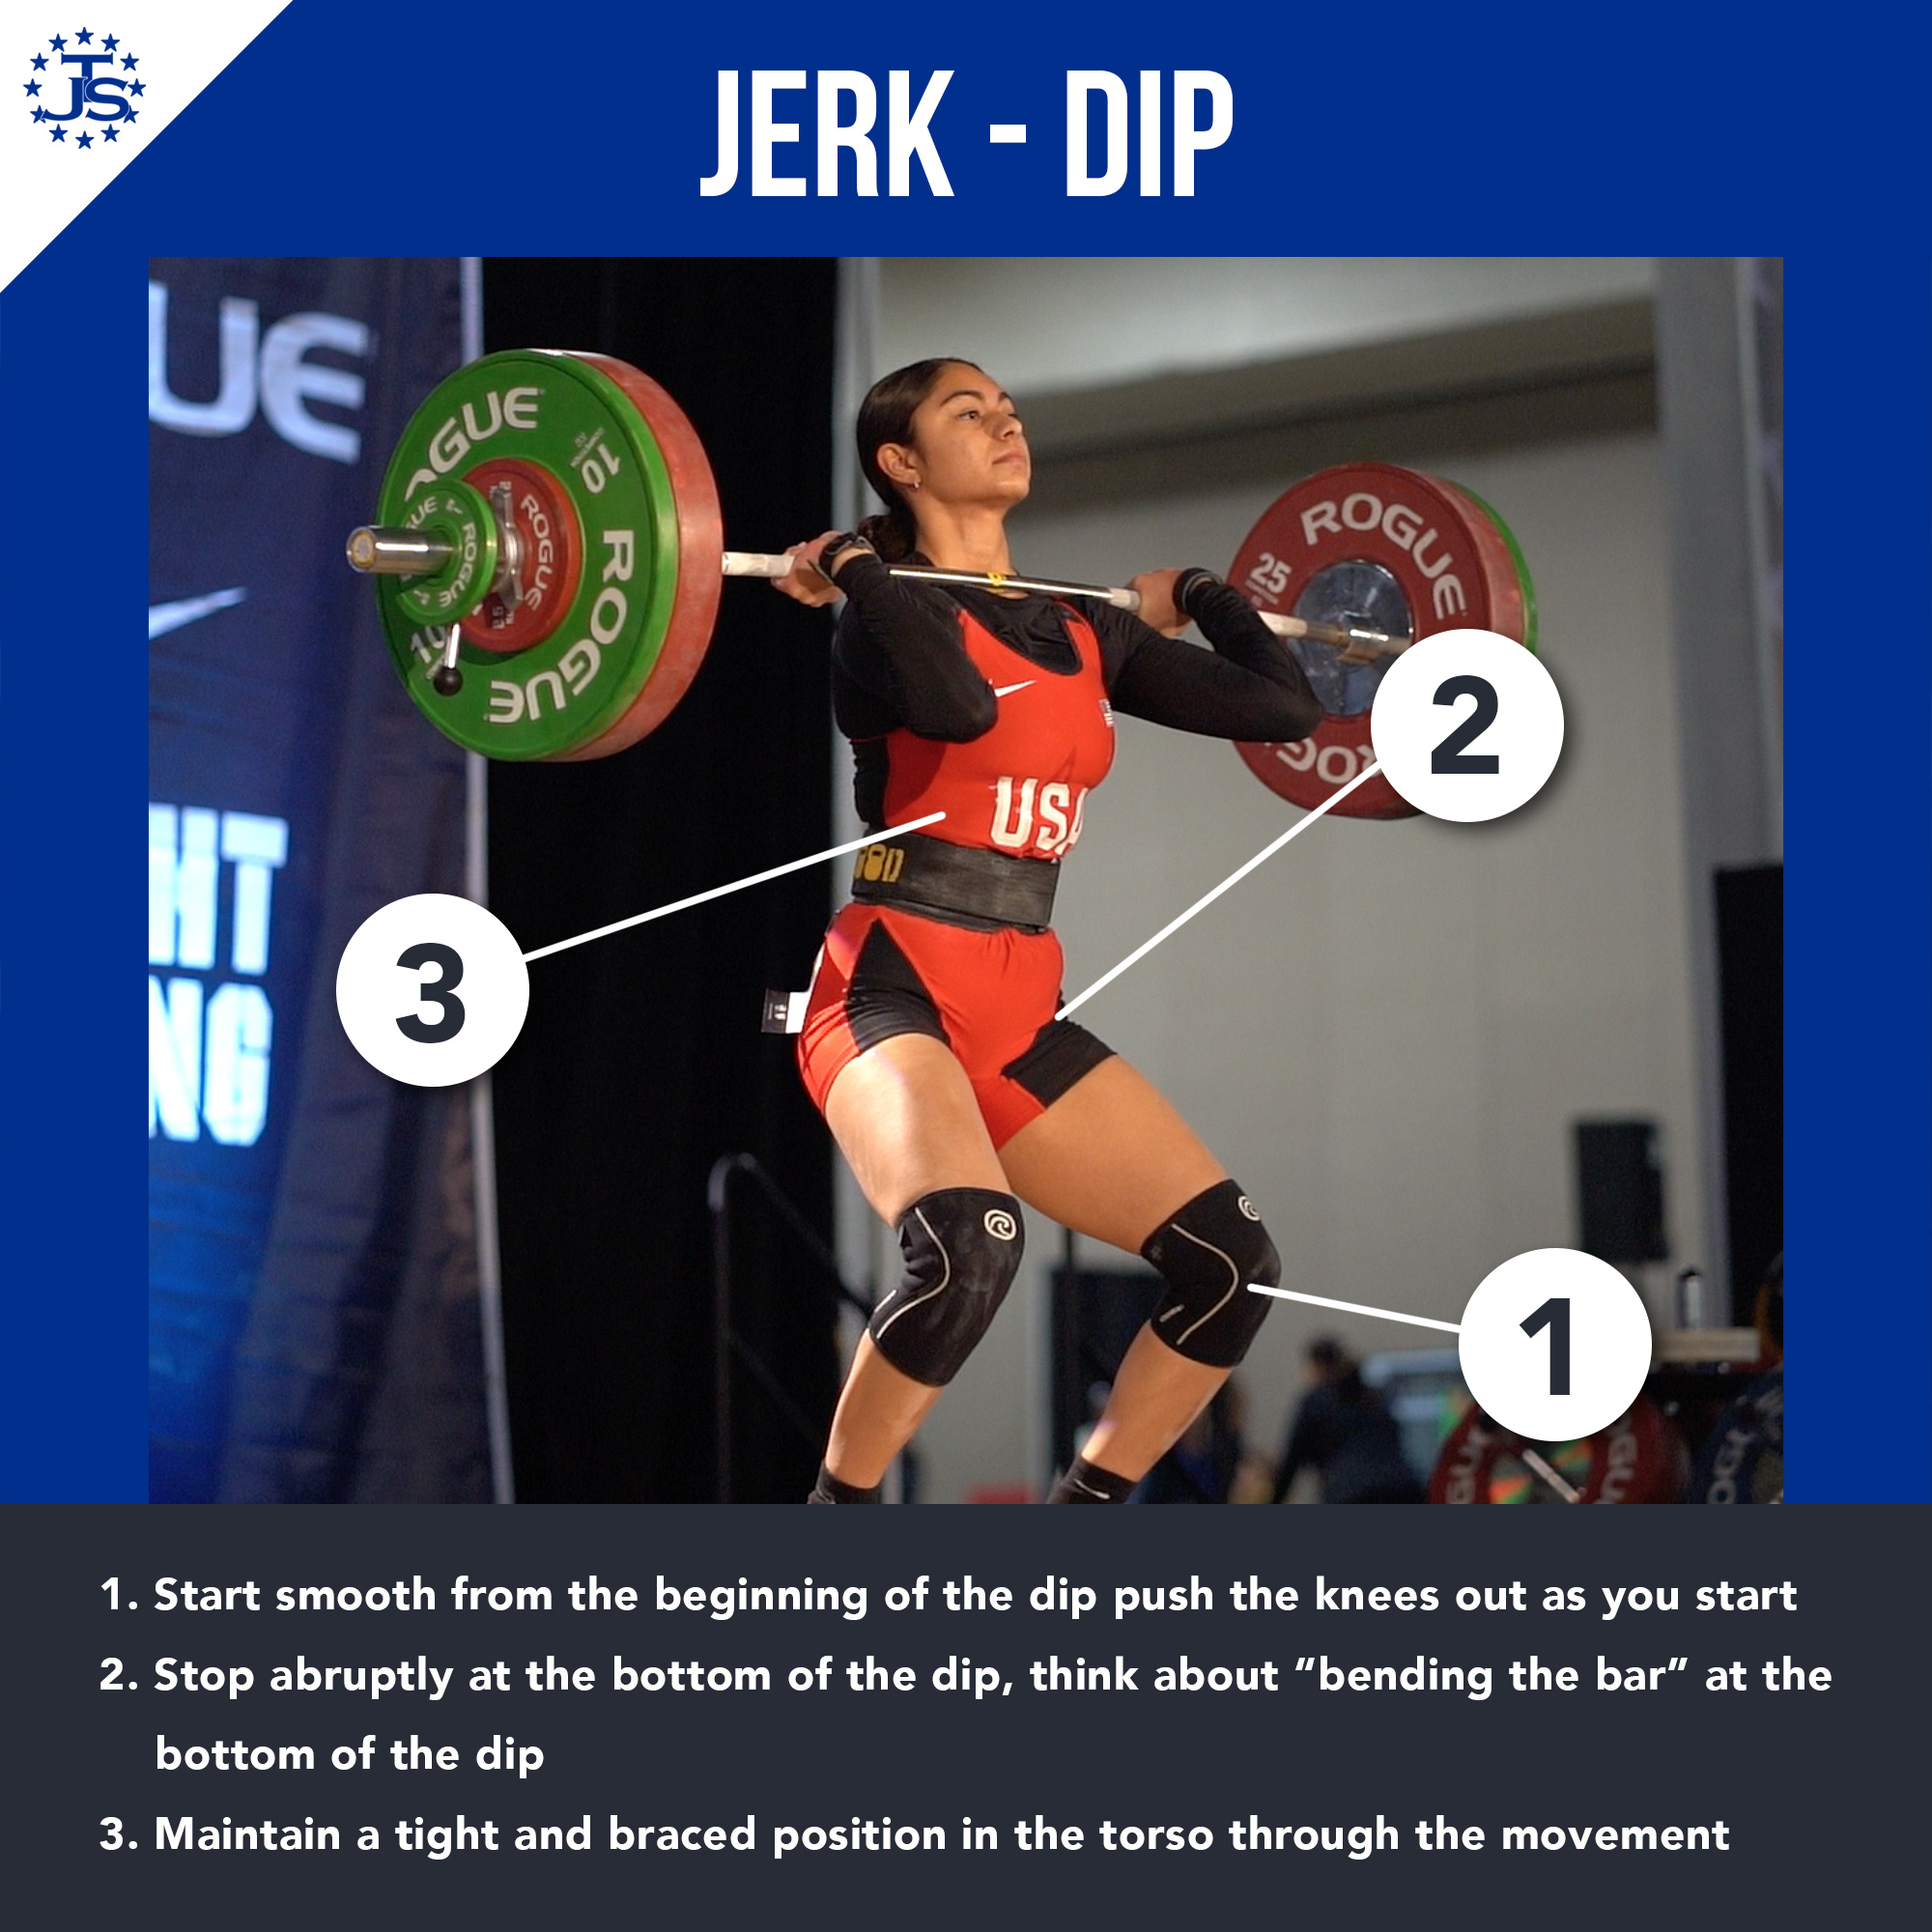
How to start the dip properly in order to set yourself up for a powerful drive.
#1-Start Smooth
Initiate the dip with a smooth and controlled tempo to prevent any loss of balance as you start the movement. Once the movement has initiated allow yourself to accelerate to the bottom of the dip.
#2-Stop Abruptly
The bottom of the dip should be an abrupt stop that allows you to capitalize on the oscillation of the barbell and the elastic components of your leg/hip muscles to drive improve the power of the drive.
#3-Maintain a Braced Position
In order to maximize your ability to stop the downward motion of the barbell in the dip you need to maintain tightness and rigidity in your torso.


Here are the key points for developing as much power and control as you can in the drive of the Jerk.
#1-Time the Drive
Dipping and stopping abruptly will force the barbell to oscillate and this effect will dramatically improve the power of the drive BUT it must be timed properly. During the dip phase you should already be anticipating the rebound and drive in order to time the explosion correctly.
#2-Drive Through the Legs
The majority of the power you generate in the drive will come from your legs, ensure that you generate as much power as possible by completing your extension as the drive is completed.
#3-Use the Upper Body
Approximately halfway up the drive you should be starting to press up against the barbell in preparation for catching it overhead as well as keeping contact with it and maintaining awareness of its position once it becomes airborne.

The split position in the Jerk requires timing, positioning and tempo of your footwork. Correct placement of the feet, shins, hips, knees, etc is all important.
#1-The Back Foot
Your back foot should be planted down on the floor just before the front foot lands on the platform. This allows for a much better receiving position and timing of the lockout.
#2-Front Shin Perpendicular
Moments after the rear foot comes down the front foot will land several feet in front of where it started. The distance should be enough to ensure that the shin ends up perpendicular to the floor so that your weight is properly distributed between front and back feet. The knee should NOT be in front of or over the toes.
#3-Overhead Position
The barbell should be locked out behind the head with arms slightly internally rotated. If you draw a line from the barbell down to the floor it should cross over the shoulder, and hip and bisect the split position. Your combined weight should be balanced with the bar overhead.


Don’t miss your Jerks after the hard work is completed. Recovering properly from the split position is key to maintaining your balance when moving your feet together.
#1-Push With Both Legs
Before moving your feet, push up against the bar with both legs so that you have more room to actually move your feet under you.
#2-Front Foot First
Move the front foot first, take several short steps back.
#3-Short Steps with Back Foot
Move your back foot forward with the same short steps as before. Then repeat the process until your feet are directly under your hips.


